Firebase Local Emulator Suite で iOS メモアプリを作ってみた
はじめに
Supabase には Supabase Local という仕組みがあって、Docker で PostgreSQL や Auth をまるごとローカルに立ち上げて開発できます。使ったことがあったのですが、ふと「Firebase にも同じようなものはないのか?」と気になり調べてみたら Firebase Local Emulator Suite というものがありました。Auth、Firestore、Cloud Functions をローカルで動かせて、Firebase プロジェクトを作らなくても開発と検証ができるようです。
試しに iOS のメモアプリを作って動かしてみたので、その過程をまとめます。
Firebase Local Emulator Suite とは
Firebase Local Emulator Suite は、Firebase の各サービスをローカルマシン上でエミュレートするツールです。Auth、Firestore、Realtime Database、Cloud Functions、Cloud Storage、Hosting など主要なサービスに対応していて、ほぼすべての Firebase 機能をローカルで再現できます。
ポイントは demo- プレフィックスです。公式ドキュメントにある通り、プロジェクト ID を demo- で始めると実際の Firebase プロジェクトが存在しなくても Emulator が動作します。Google Cloud への課金も発生しません。.firebaserc に demo-local-memo と書いておくだけで、ローカルだけで閉じた環境が手に入ります。
Emulator には Web UI も付いていて、http://localhost:4000 から Auth のユーザー一覧や Firestore のドキュメントをブラウザ上で確認できます。
作ったもの
iOS のメモアプリを作りました。Firebase Auth でメール/パスワード認証を行い、Cloud Firestore にメモを保存します。Cloud Functions の Firestore トリガーで本文の文字数を自動計算する仕組みも入れています。
メモを作成すると Cloud Functions が Firestore の変更を検知し、本文の文字数を wordCount フィールドに書き込みます。アプリ側はリアルタイムリスナーでこの変更を受け取り、文字数を画面に表示します。
Emulator のセットアップ
firebase.json の設定
firebase.json に Emulator の設定を書きます。Auth、Firestore、Cloud Functions それぞれのポート番号と、Emulator UI のポートを指定しています。
{
  "firestore": {
    "rules": "firestore.rules",
    "indexes": "firestore.indexes.json"
  },
  "functions": [
    {
      "source": "functions",
      "codebase": "default",
      "ignore": ["node_modules", ".git"],
      "predeploy": ["npm --prefix \"$RESOURCE_DIR\" run build"]
    }
  ],
  "emulators": {
    "auth": { "port": 9099 },
    "functions": { "port": 5001 },
    "firestore": { "port": 8080 },
    "ui": { "enabled": true, "port": 4000 },
    "singleProjectMode": true
  }
}
.firebaserc
プロジェクト ID に demo- プレフィックスを付けます。
{
  "projects": {
    "default": "demo-local-memo"
  }
}
Emulator の起動
firebase emulators:startこれだけで Auth(9099)、Firestore(8080)、Cloud Functions(5001)、Emulator UI(4000)が立ち上がります。
iOS アプリの実装
Emulator への接続設定
AppDelegate.swift で、DEBUG ビルド時のみ Emulator に接続するよう設定します。demo- プレフィックスのプロジェクト ID を指定し、各サービスのエンドポイントを localhost に向けています。
class AppDelegate: NSObject, UIApplicationDelegate {
    func application(
        _ application: UIApplication,
        didFinishLaunchingWithOptions launchOptions: [UIApplication.LaunchOptionsKey: Any]? = nil
    ) -> Bool {
        #if DEBUG
        let options = FirebaseOptions(
            googleAppID: "1:000000000000:ios:0000000000000000",
            gcmSenderID: "000000000000"
        )
        options.projectID = "demo-local-memo"
        options.apiKey = "fake-api-key"
        FirebaseApp.configure(options: options)

        Auth.auth().useEmulator(withHost: "localhost", port: 9099)

        let settings = Firestore.firestore().settings
        settings.host = "localhost:8080"
        settings.isSSLEnabled = false
        settings.cacheSettings = MemoryCacheSettings()
        Firestore.firestore().settings = settings

        Functions.functions().useEmulator(withHost: "localhost", port: 5001)
        #else
        FirebaseApp.configure()
        #endif

        return true
    }
}
googleAppID や apiKey はダミー値で問題ありません。Emulator はこれらの値を検証しないので、実際の Firebase プロジェクトを作る必要がありません。
データモデル
Memo モデルは Firestore の @DocumentID と @ServerTimestamp を使ったシンプルな構造体です。wordCount は Cloud Functions が自動で書き込むため、Optional にしています。
struct Memo: Identifiable, Codable, Hashable {
    @DocumentID var id: String?
    var title: String
    var content: String
    var userId: String
    var wordCount: Int?
    @ServerTimestamp var createdAt: Timestamp?
    @ServerTimestamp var updatedAt: Timestamp?
}
リアルタイムリスナー
MemoListViewModel では Firestore の addSnapshotListener を使い、メモの変更をリアルタイムに受信しています。Cloud Functions が wordCount を書き込んだタイミングで自動的に UI が更新されます。
@Observable
@MainActor
final class MemoListViewModel {
    var memos: [Memo] = []
    private let service = FirestoreService()
    private var listener: ListenerRegistration?

    func startListening(userId: String) {
        listener?.remove()
        listener = service.memosQuery(userId: userId)
            .addSnapshotListener { [weak self] snapshot, _ in
                guard let self else { return }
                self.memos = snapshot?.documents.compactMap {
                    try? $0.data(as: Memo.self)
                } ?? []
            }
    }

    func stopListening() {
        listener?.remove()
        listener = nil
    }
}
Cloud Functions の実装
Cloud Functions は TypeScript で書いています。Firestore トリガーを使い、メモの作成時と更新時に wordCount を自動計算します。
import { onDocumentCreated, onDocumentUpdated } from "firebase-functions/v2/firestore";
import { getFirestore, FieldValue } from "firebase-admin/firestore";
import { initializeApp } from "firebase-admin/app";
import { logger } from "firebase-functions";

initializeApp();
const db = getFirestore();

export const onMemoCreated = onDocumentCreated("memos/{memoId}", async (event) => {
  const snapshot = event.data;
  if (!snapshot) return;

  const data = snapshot.data();
  const content: string = data.content || "";
  const wordCount = content.length;

  logger.info(`メモ作成: ${event.params.memoId}, 文字数: ${wordCount}`);

  await db.doc(`memos/${event.params.memoId}`).update({
    wordCount,
    updatedAt: FieldValue.serverTimestamp(),
  });
});

export const onMemoUpdated = onDocumentUpdated("memos/{memoId}", async (event) => {
  const before = event.data?.before.data();
  const after = event.data?.after.data();
  if (!before || !after) return;

  if (before.content === after.content) return;

  const wordCount = (after.content || "").length;

  logger.info(`メモ更新: ${event.params.memoId}, 文字数: ${wordCount}`);

  await db.doc(`memos/${event.params.memoId}`).update({
    wordCount,
    updatedAt: FieldValue.serverTimestamp(),
  });
});
onMemoUpdated では before.content === after.content のチェックを入れています。wordCount の書き込み自体がドキュメント更新を発生させるため、このガードがないと無限ループになります。
Firestore Security Rules
セキュリティルールもローカルで検証できます。Emulator はルールファイルを読み込み、実際の Firestore と同じようにアクセス制御を適用します。
rules_version = '2';

service cloud.firestore {
  match /databases/{database}/documents {
    match /memos/{memoId} {
      allow read, delete: if isOwner();

      allow create: if request.auth != null
        && request.resource.data.userId == request.auth.uid
        && request.resource.data.keys().hasAll(['title', 'content', 'userId']);

      allow update: if isOwner();

      function isOwner() {
        return request.auth != null
          && request.auth.uid == resource.data.userId;
      }
    }
  }
}
認証済みユーザーだけがメモを作成でき、自分のメモだけを閲覧・編集・削除できるルールです。
動作確認
Emulator を起動してアプリを実行すると、すべてがローカルで完結します。
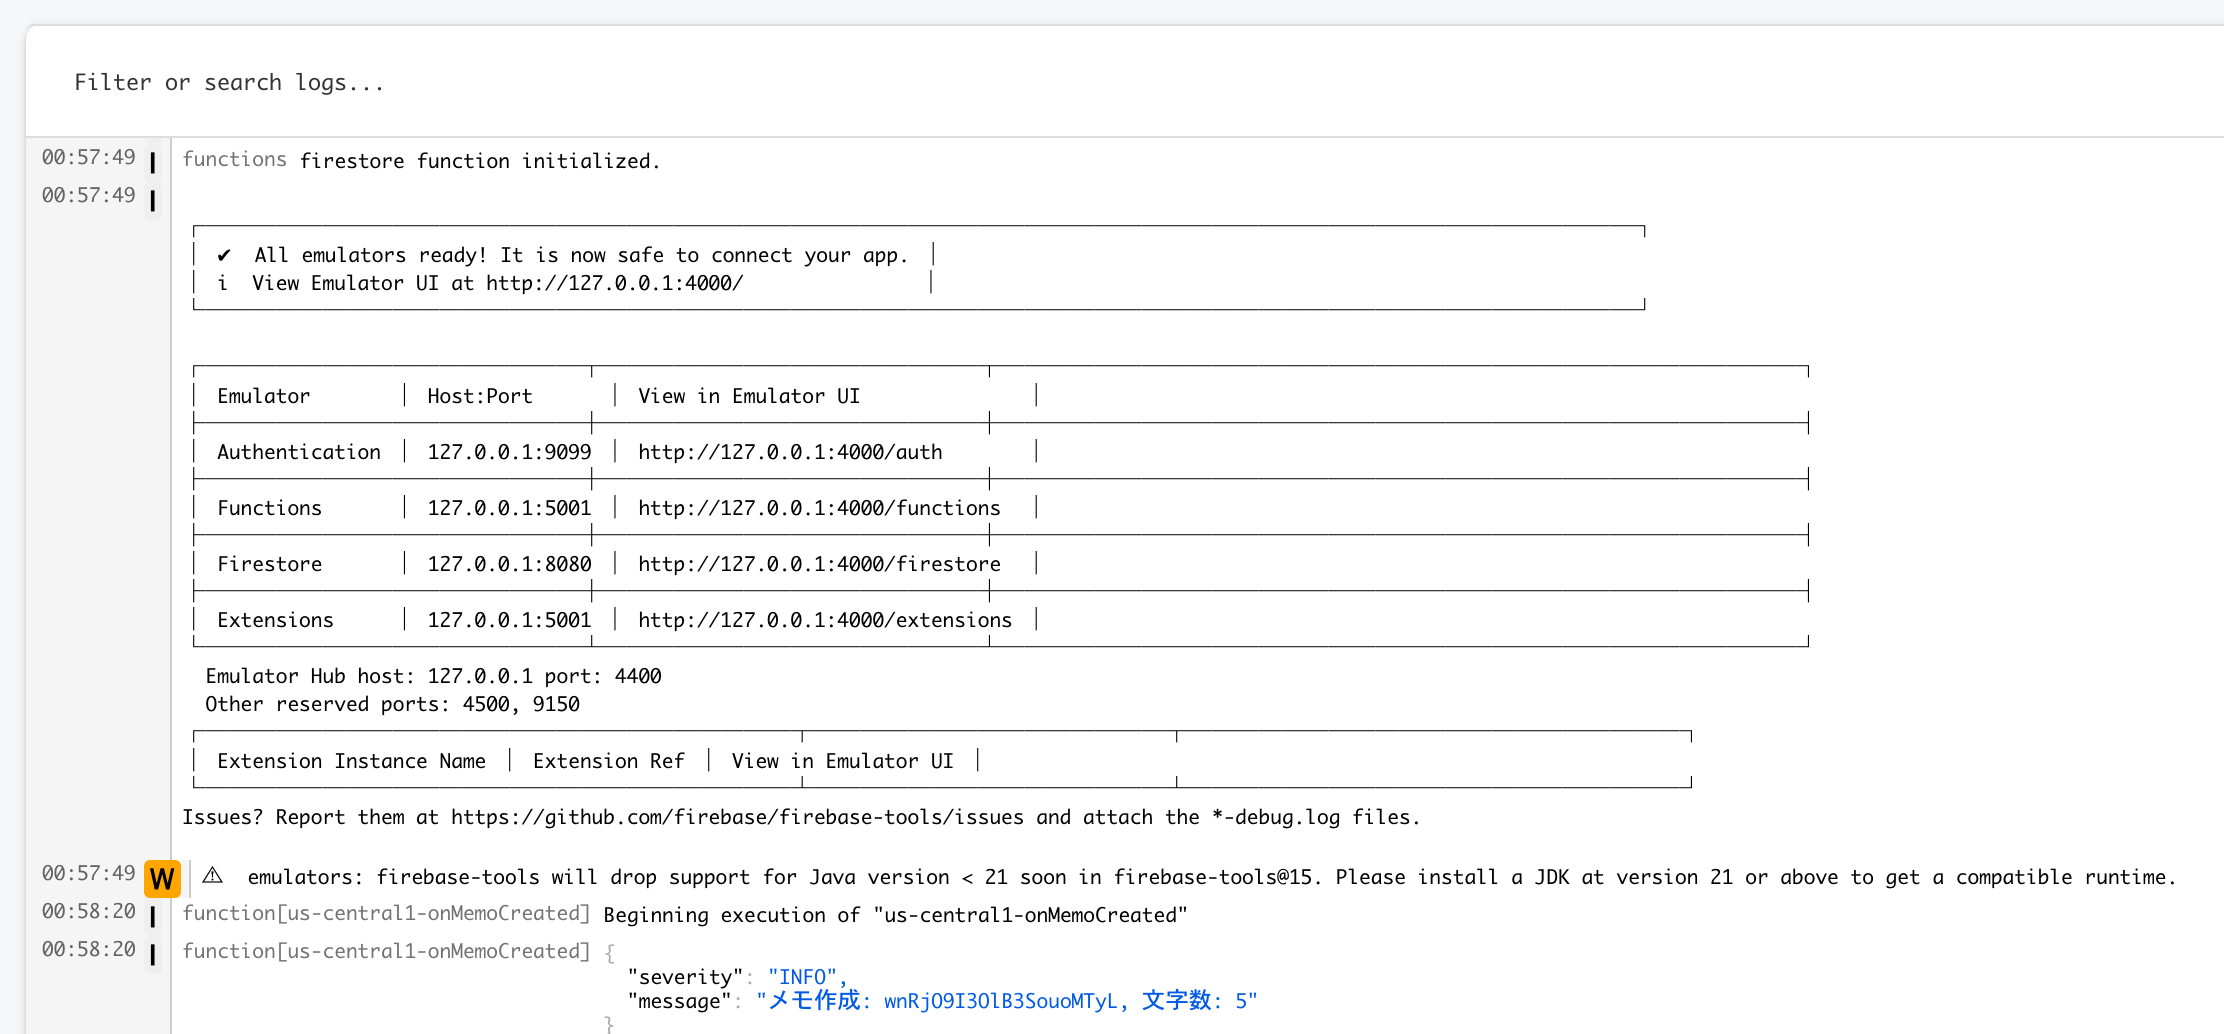
Cloud Functions のログ
Emulator のコンソールには Cloud Functions の実行ログが出力されます。メモ作成時に onMemoCreated がトリガーされ、文字数が計算されている様子がわかります。
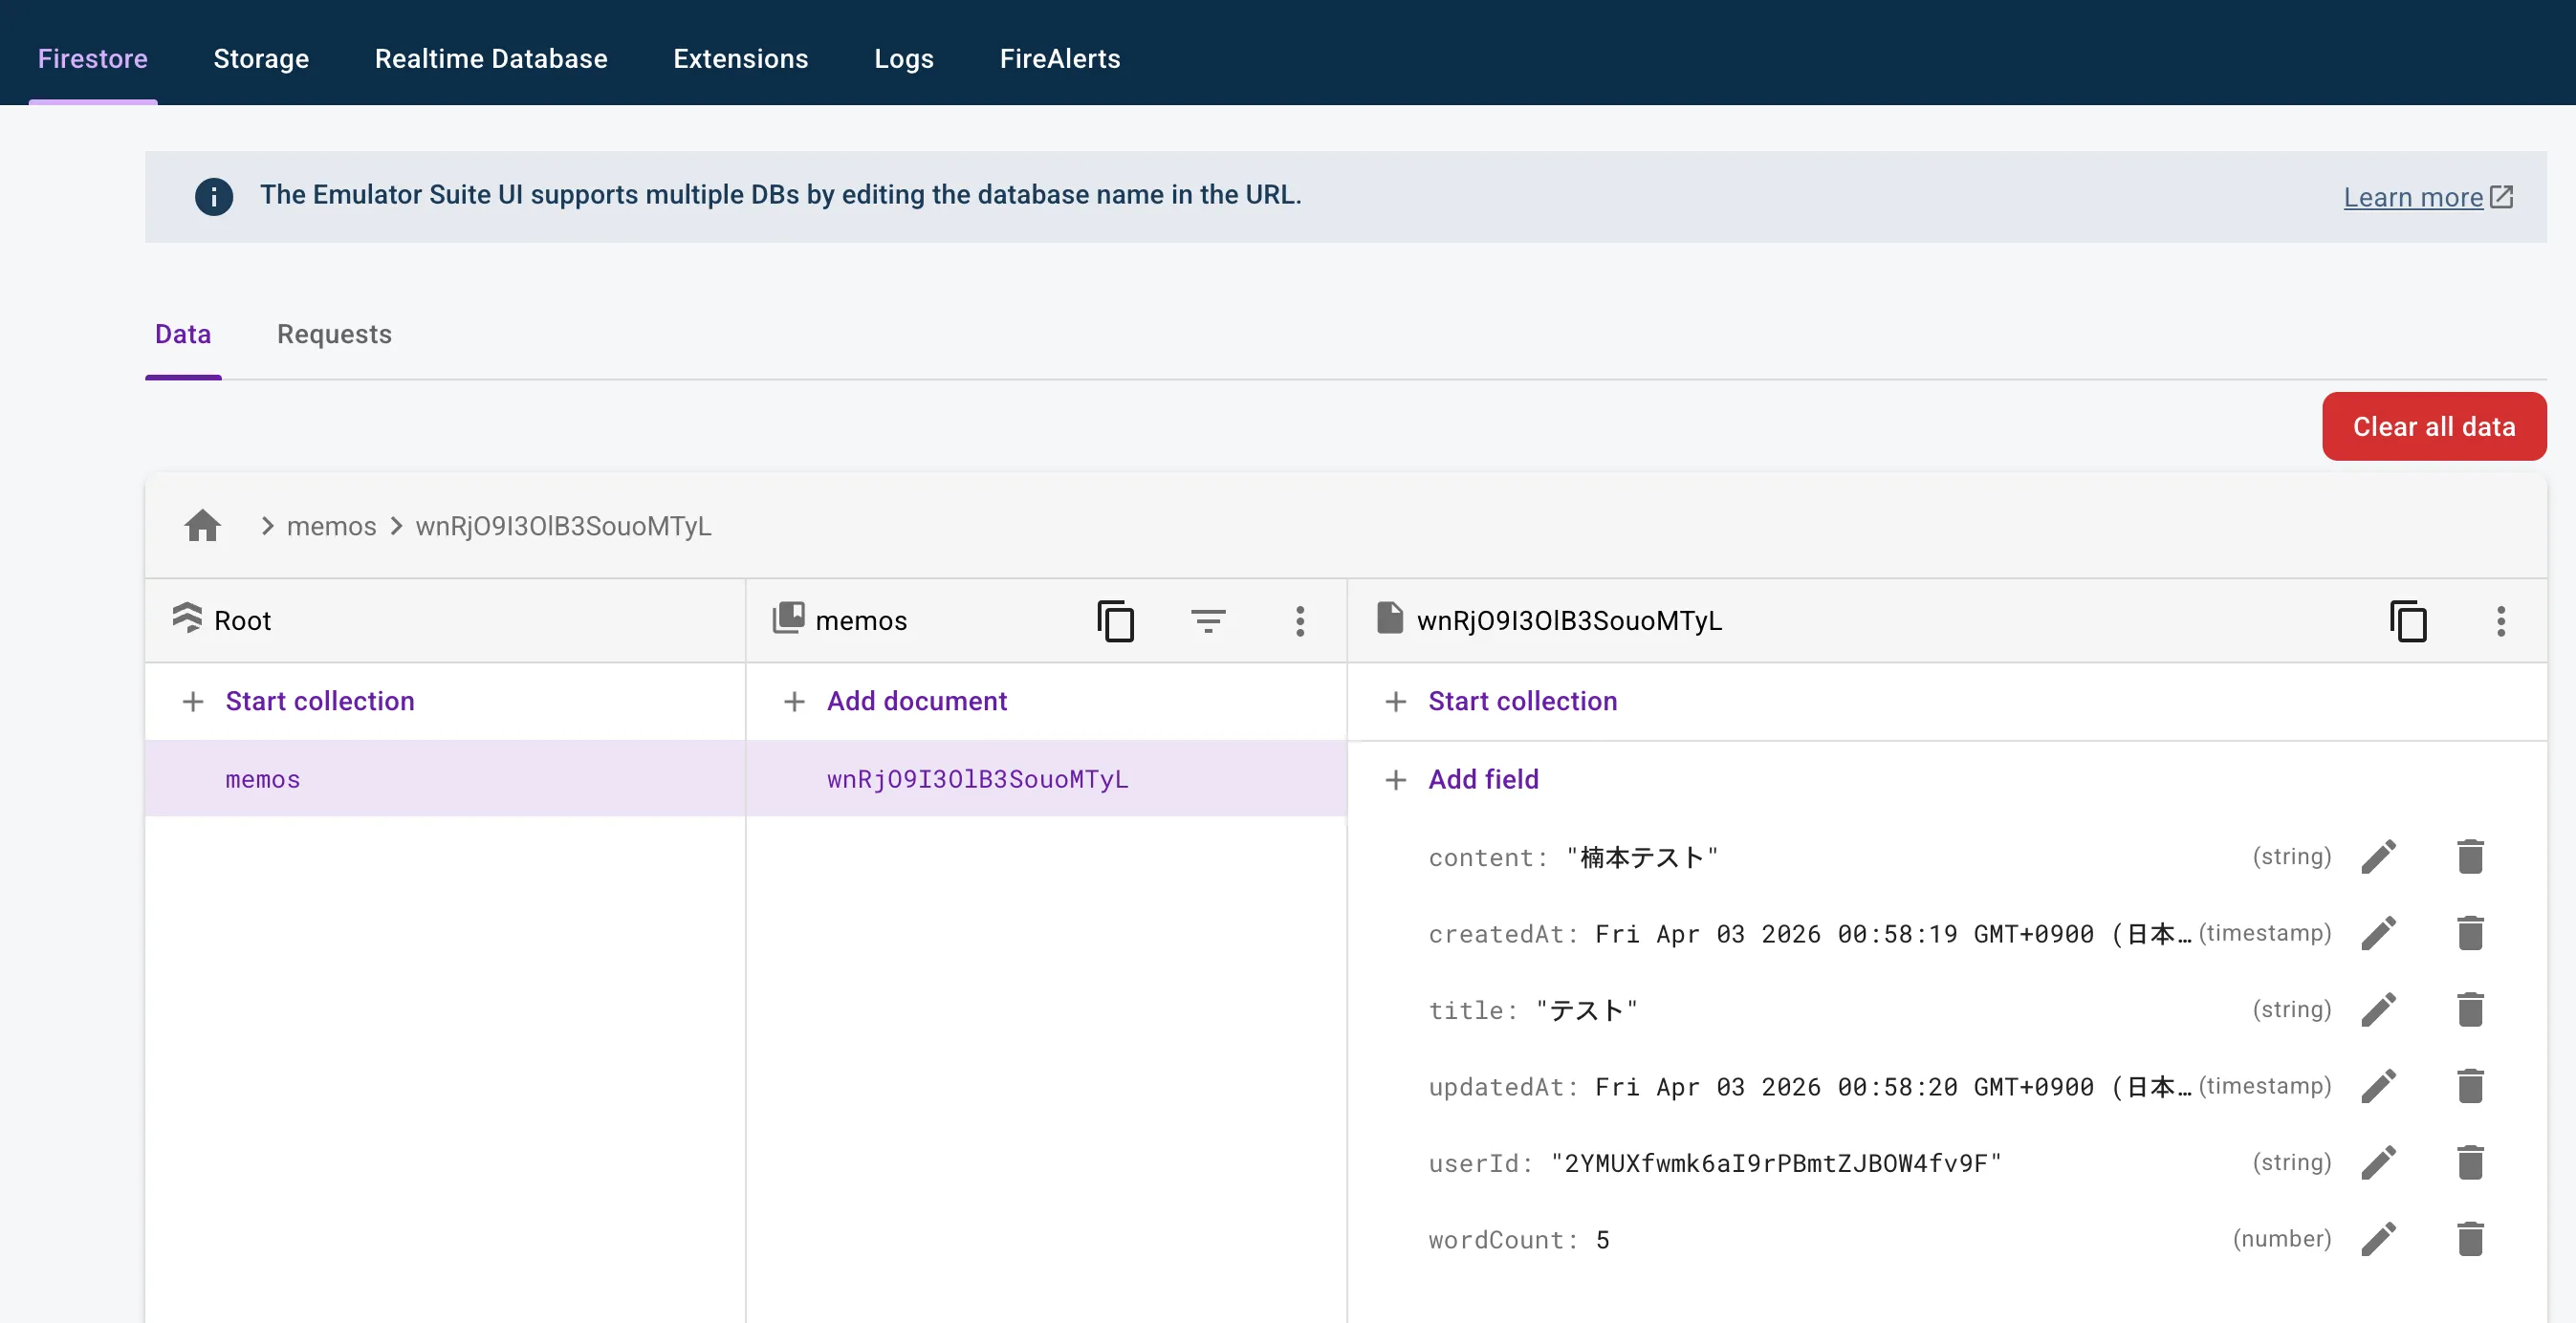
Firestore のデータ
Emulator UI の Firestore タブから、保存されたドキュメントを確認できます。wordCount: 5 が Cloud Functions によって自動的に付与されています。
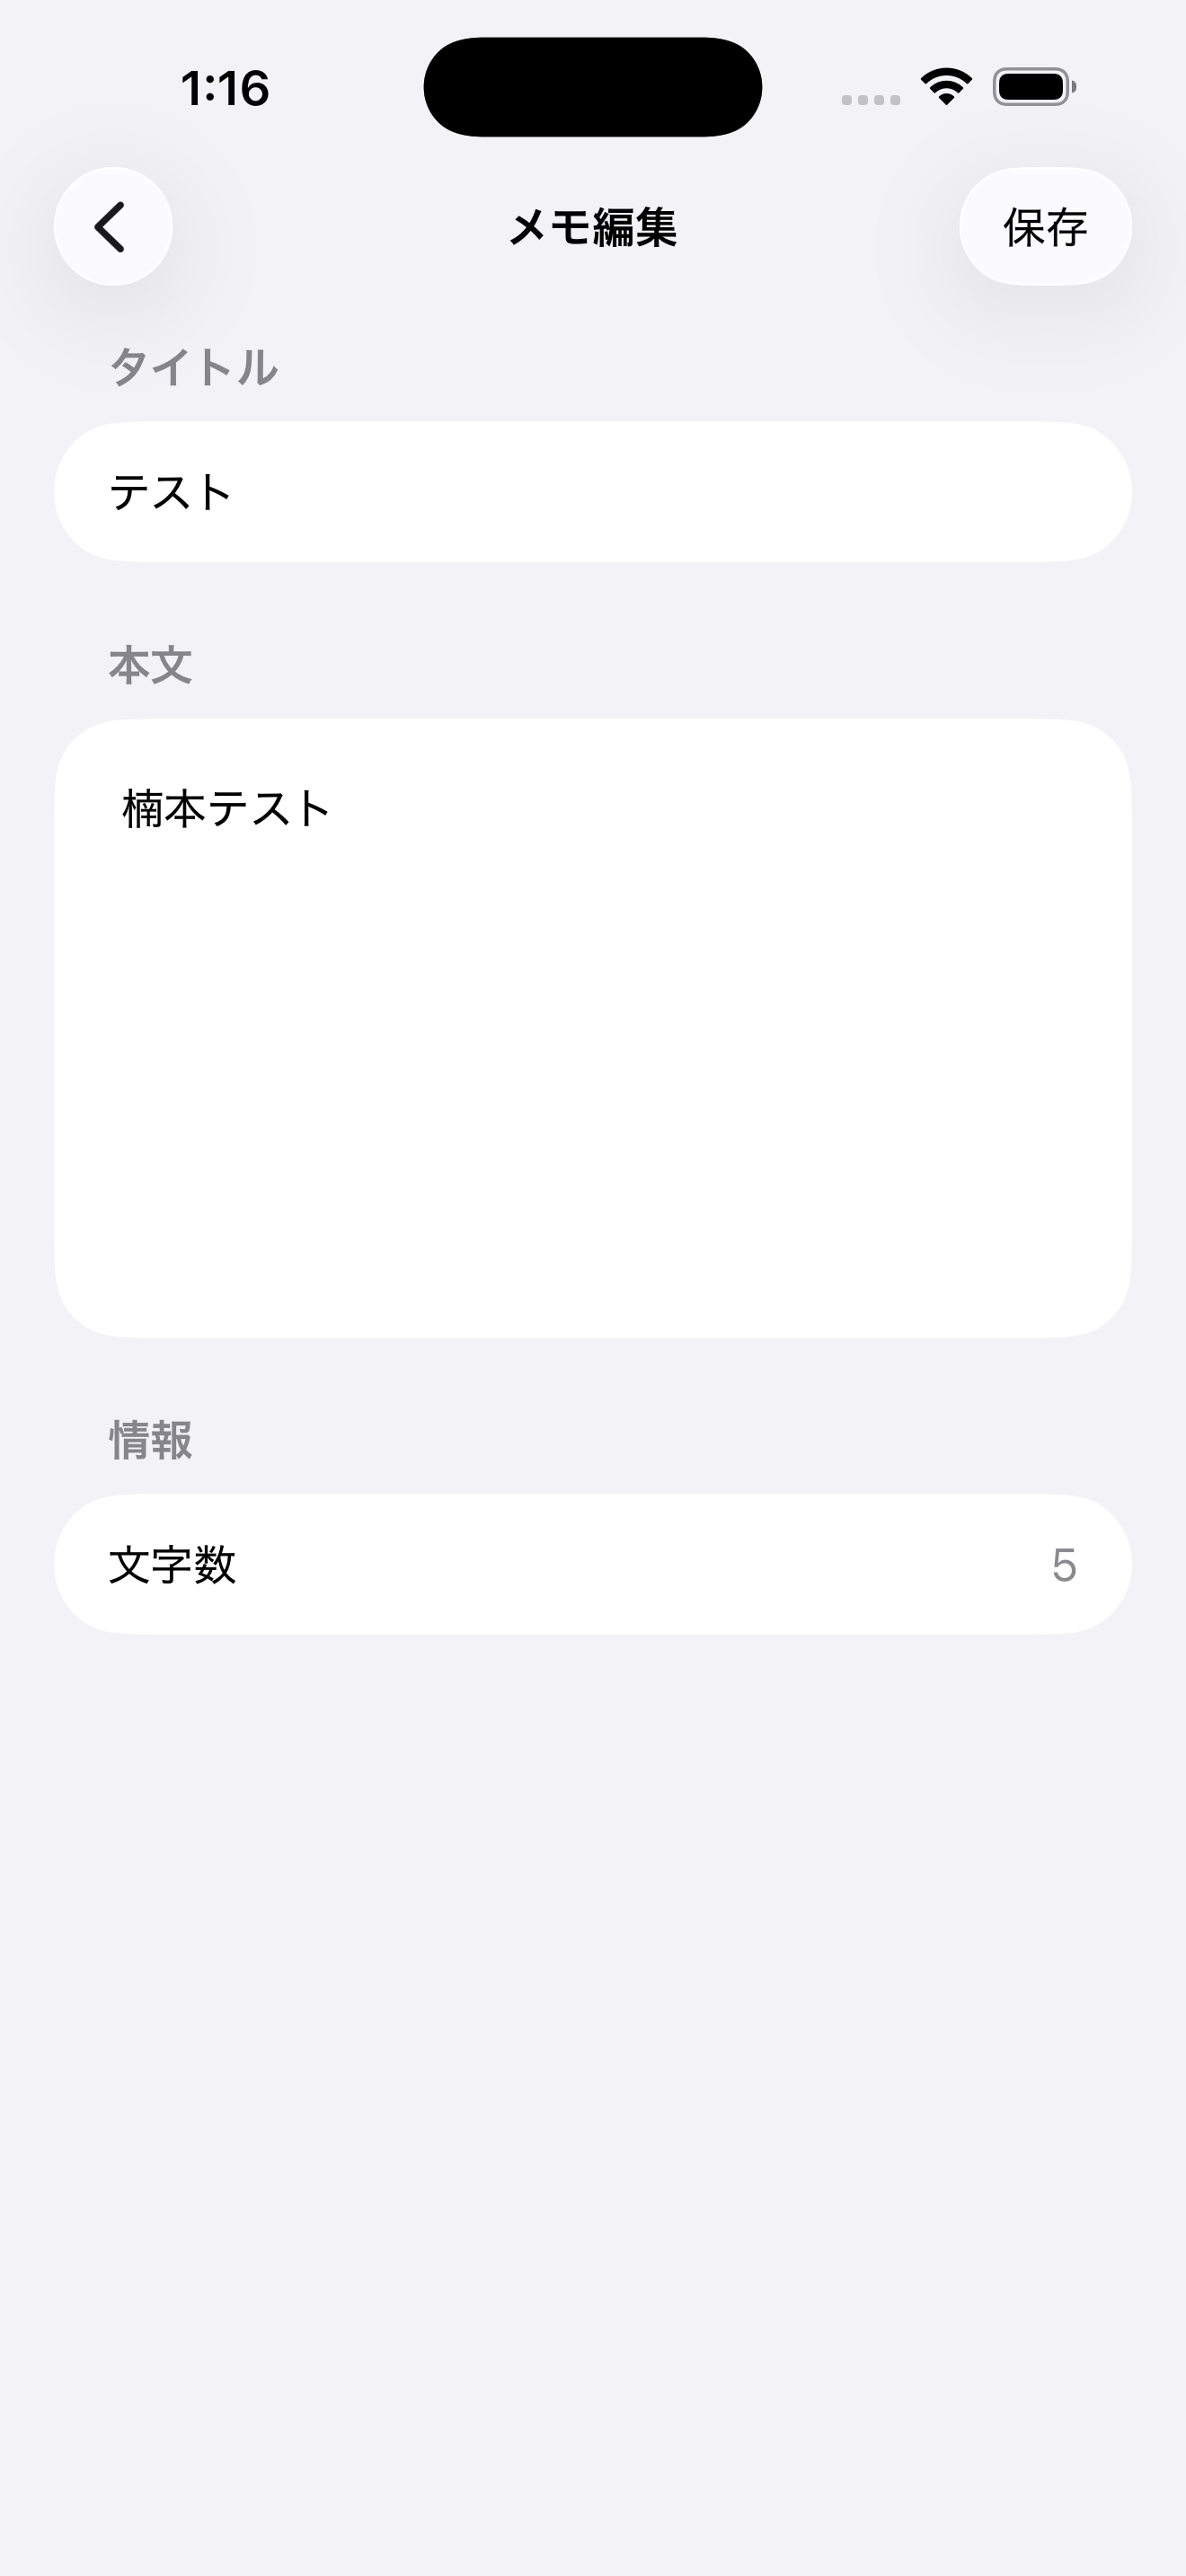
iOS Simulator
iOS Simulator 上でメモの編集画面を開くと、タイトル・本文・文字数が表示されています。Cloud Functions が計算した文字数がリアルタイムに反映されています。
まとめ
Firebase Local Emulator Suite を使うと、Firebase プロジェクトを作らずにローカルだけで Auth、Firestore、Cloud Functions の検証ができました。demo- プレフィックスのおかげで Google Cloud のアカウントすら不要です。
とりあえずの検証にはとてもよかったです。Cloud Functions の Firestore トリガーがローカルでそのまま動くので、デバッグサイクルが短くなって助かりました。Firebase を使ったアプリを新しく作るときや、Cloud Functions を試してみたいときに便利だと思うので、よければ使ってみてください。
参考リンク
- Firebase Local Emulator Suite - 公式ドキュメント
- Connect your app to the Cloud Firestore Emulator - Firestore Emulator の接続ガイド
- Connect your app to the Authentication Emulator - Auth Emulator の接続ガイド